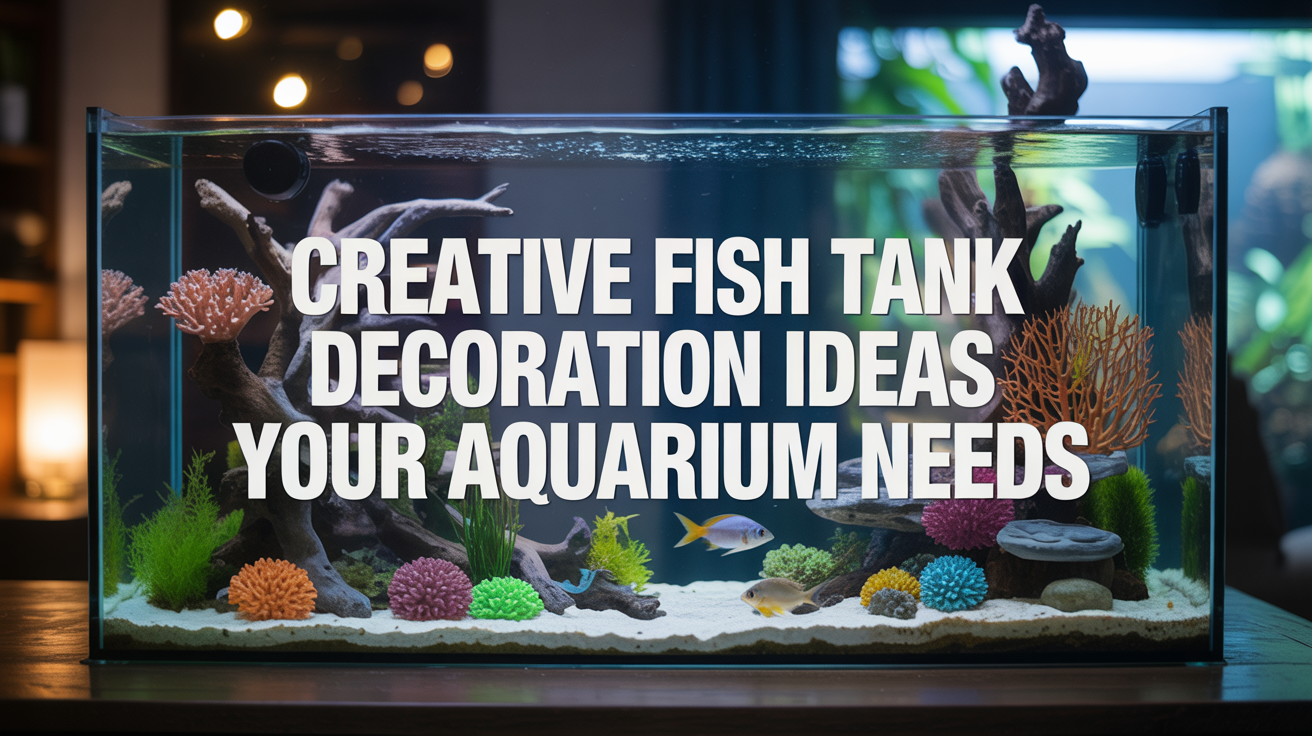
Your fish tank looks boring. Maybe you’ve got the same castle and plastic plants everyone else has, or your aquarium just feels empty and lifeless.
This guide will give you fresh decoration ideas that actually work in real tanks. You’ll find out natural setups, themed designs, and budget-friendly options that make your aquarium stand out. I’ve kept fish for years and tested these ideas myself, so I know what looks good and keeps your fish healthy and happy.
The best part? You don’t need to spend a fortune or be an expert. If you want a natural underwater forest, a colorful rock garden, or something unique, you’ll find practical ideas here. Some decorations you can make yourself, others are worth buying. Let’s turn your plain tank into an aquarium that catches everyone’s eye and gives your fish a better home.
DIY Fish Tank Decoration Items
Living plants update your aquarium into a natural paradise. They clean your water, produce oxygen, and create hiding spots for fish. Best of all, most aquarium plants are cheap and easy to grow.
- Beginner favorites: Java fern, Java moss, Anubias, and Crypts survive in almost any tank
- Fast growers: Hygrophila, Rotala, and Vallisneria fill empty spaces quickly and cheaply
- Floating coverage: Amazon Frogbit creates a forest canopy effect from above
- Theme flexibility: Arrange driftwood to create spooky, forest, or natural underwater scenes
- Tannin benefits: Add leaf litter for natural brown water and soft mood lighting
Fish Tank Decorations Ideas
Living plants, unique themes, and budget-friendly decorations can turn your aquarium into something special. You don’t need expensive store-bought items to create an amazing underwater world.
Living Plant Paradise
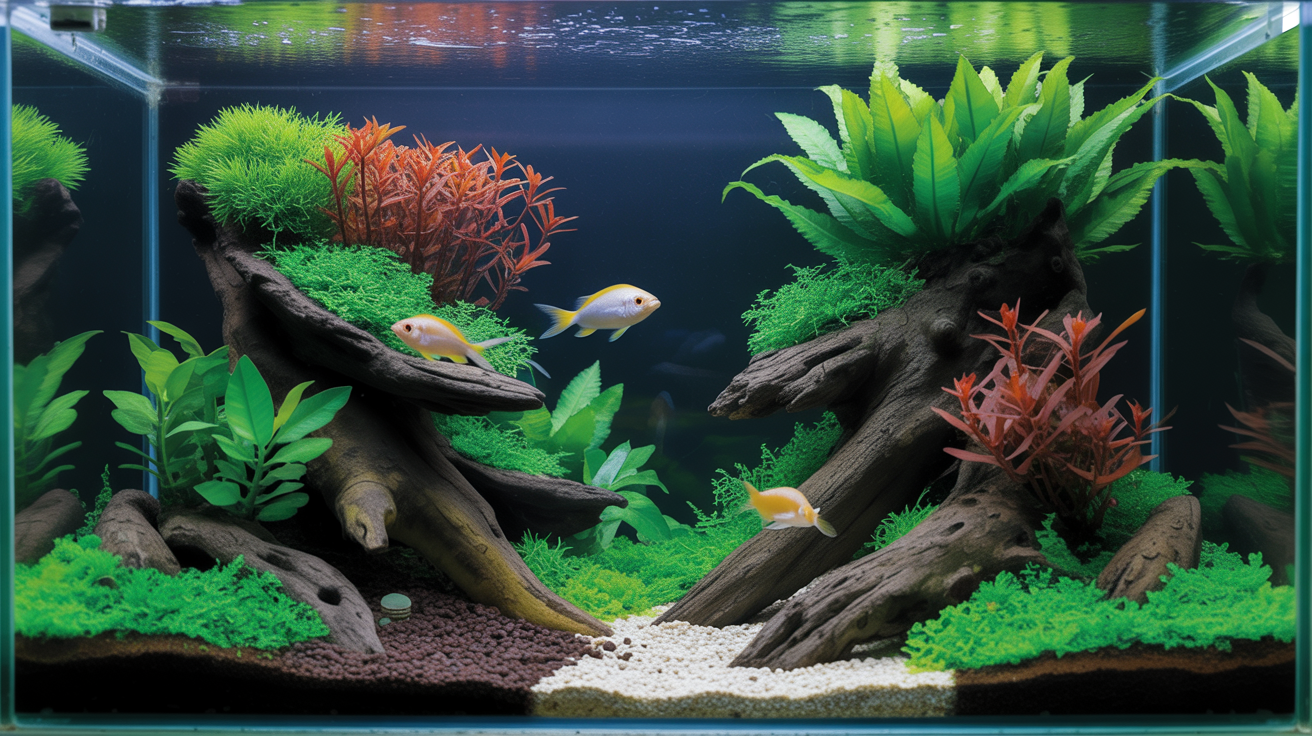
Living plants change your aquarium into a natural underwater world. They clean your water, produce oxygen, and create hiding spots for fish.
How to create this look:
- Start with beginner-friendly plants like Java fern, Java moss, Anubias, or Crypts that survive in almost any tank
- Add fast-growing plants like Hygrophila, Rotala, or Vallisneria to fill empty spaces quickly and cheaply
- Include floating plants like Amazon Frogbit to create a forest canopy effect from above
Most aquarium plants are cheap and easy to grow. Arrange driftwood between the plants to create forest or natural underwater scenes that look professional.
unique Lego Block Scenes
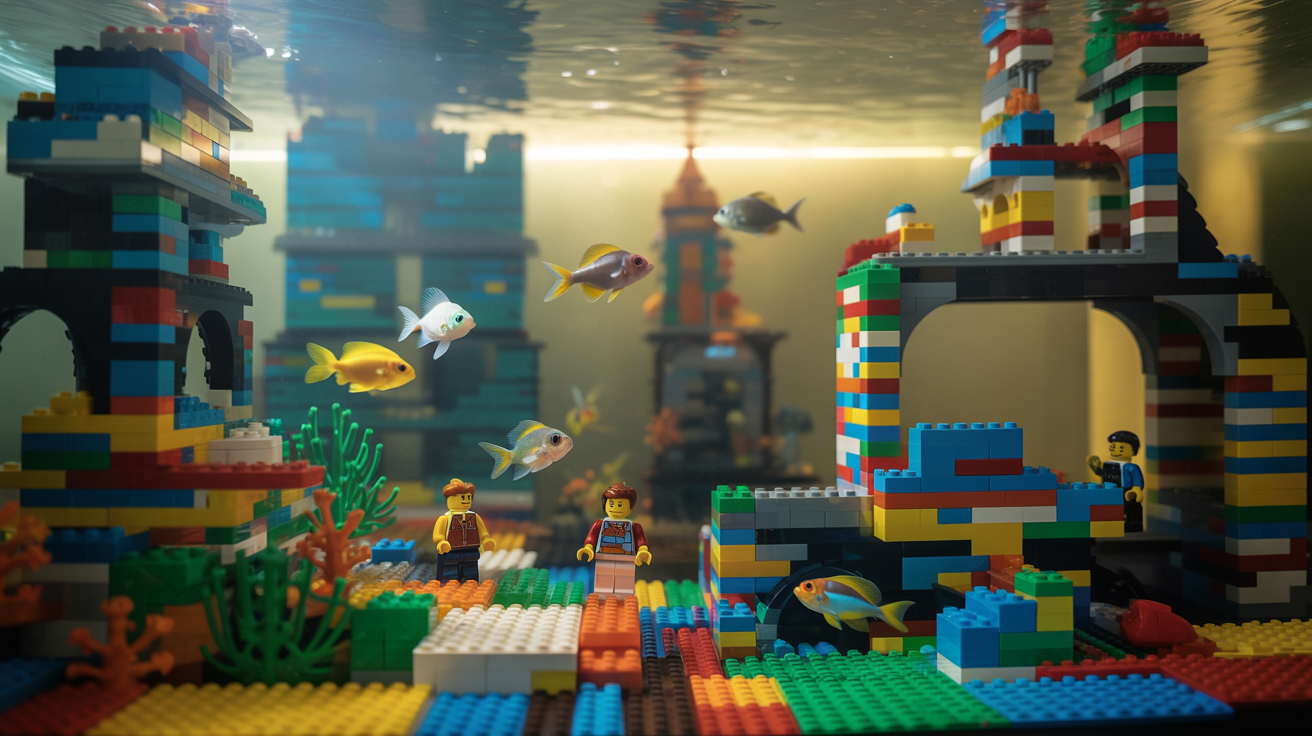
Lego blocks are perfect for aquariums because they’re non-toxic, durable, and easy to clean. Your fish will love swimming through the spaces between blocks.
How to create this look:
- Build structures like houses, castles, superhero scenes, or underwater cities using regular Lego pieces
- Rinse each piece well under water before adding it to your tank
- Start with one small structure first, then expand if you like the look
A full Lego-themed tank looks beautiful but takes extra cleaning effort. Clean the pieces during regular tank maintenance to remove algae buildup.
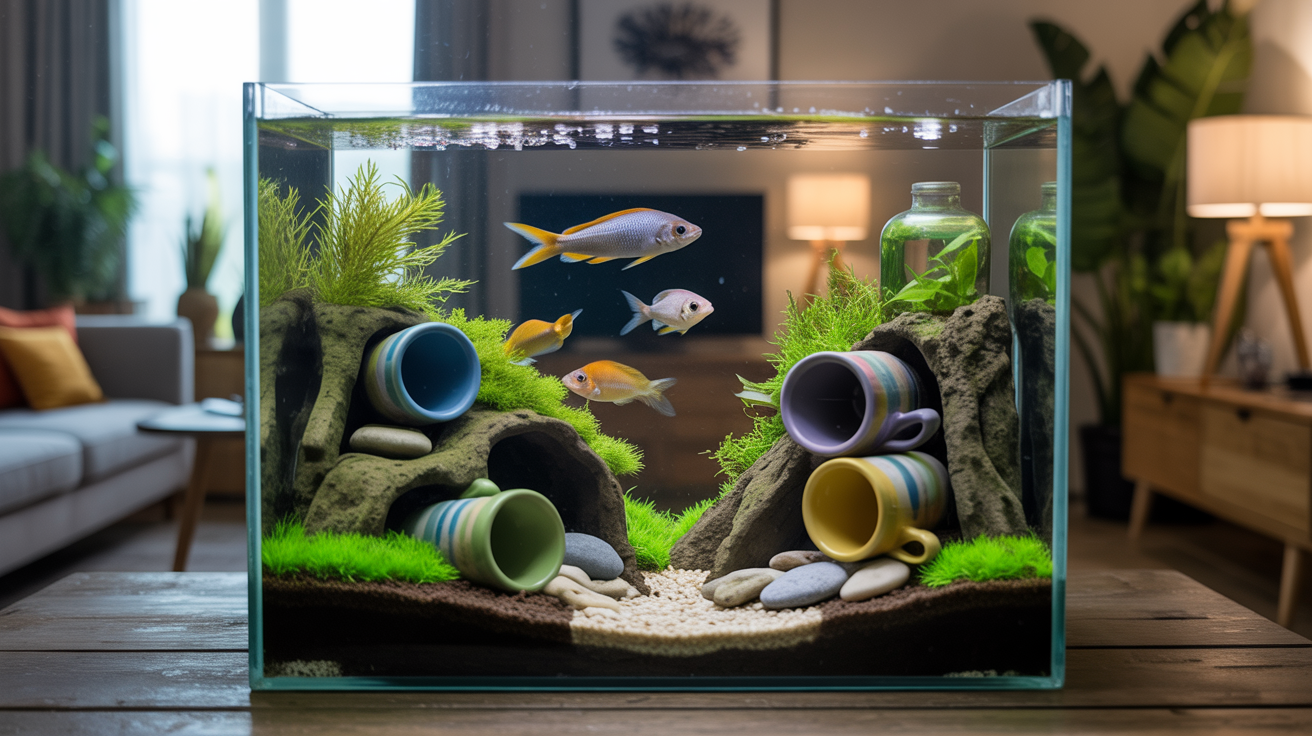
Food-Safe Teapot Caves
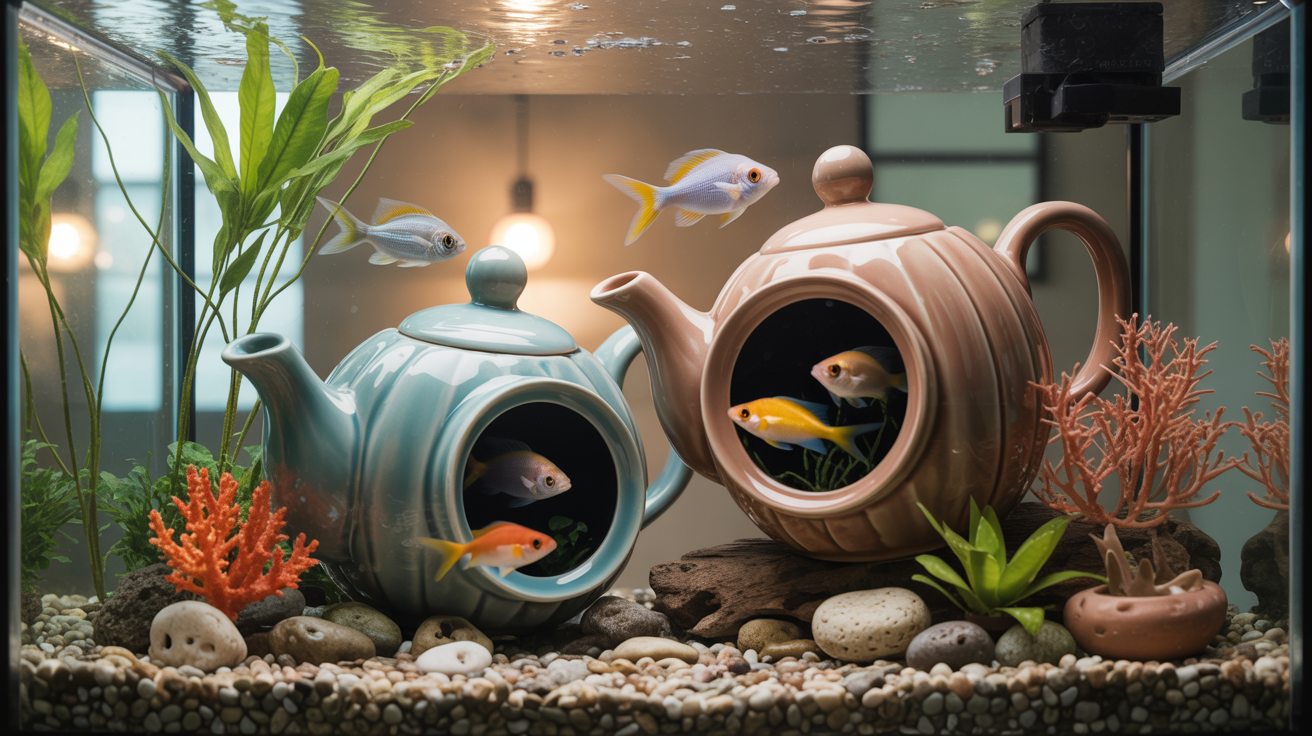
Old teapots make excellent fish caves and hiding spots. Thrift stores sell them for just a few dollars, and fish love exploring them.
How to create this look:
- Find food-safe ceramic teapots at thrift stores and check for cracks, flaking glaze, or metallic finishes (avoid these)
- Place the teapot on its side with the spout opening facing out so fish can swim in and out
- Add miniature tea cups as extra caves and saucers as platforms for variety
Miniature tea sets create magical underwater scenes. Place decorative fabric or lace outside the tank as a backdrop for a vintage tea party look.
Underwater Message in a Bottle
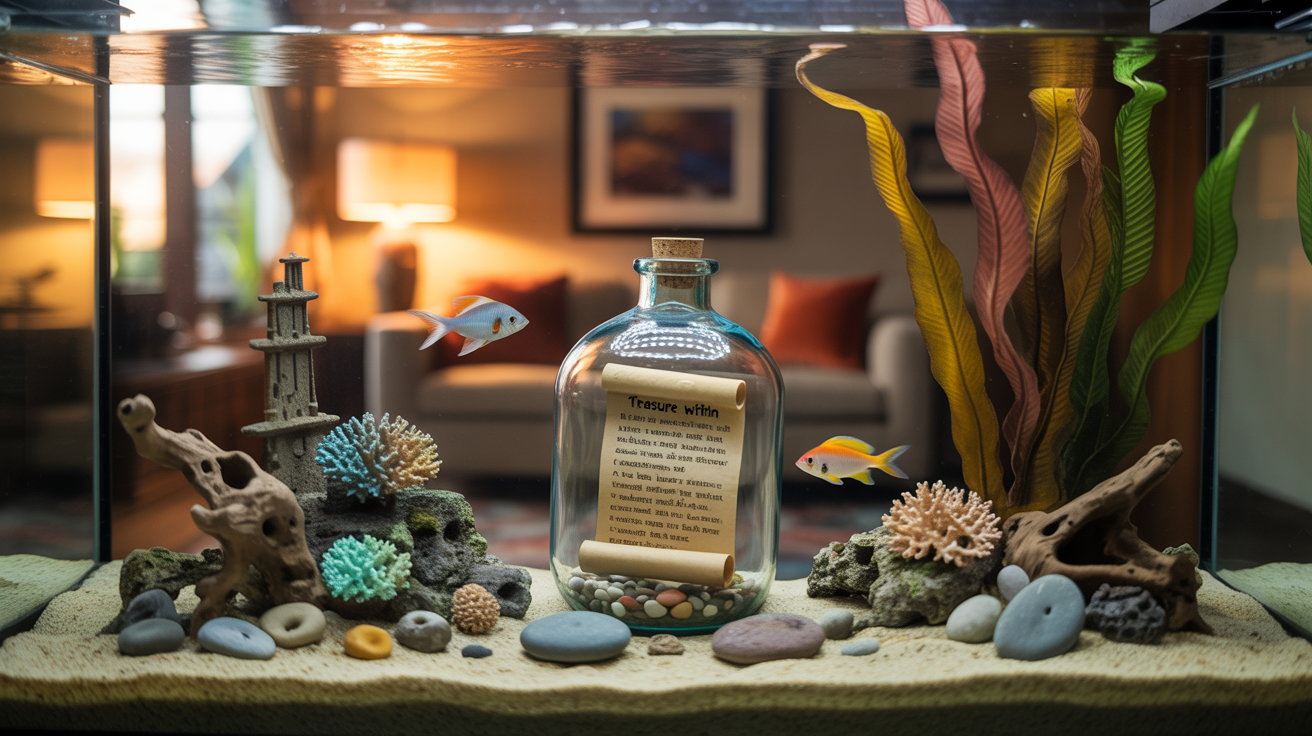
A message in a bottle adds mystery to any tank. You just need the right materials and a little patience to make it work.
How to create this look:
- Find a glass bottle (never use plastic) and fill it with marbles or smooth stones to keep it upright
- Add a message, small charms, or colored paper inside before sealing it
- Test the bottle in a bucket first to make sure it stands upright, then add it to your tank
Add marbles one at a time until the bottle stands perfectly upright. Skip regular corks because they absorb water and fall apart quickly.
River Stones and Natural Rocks
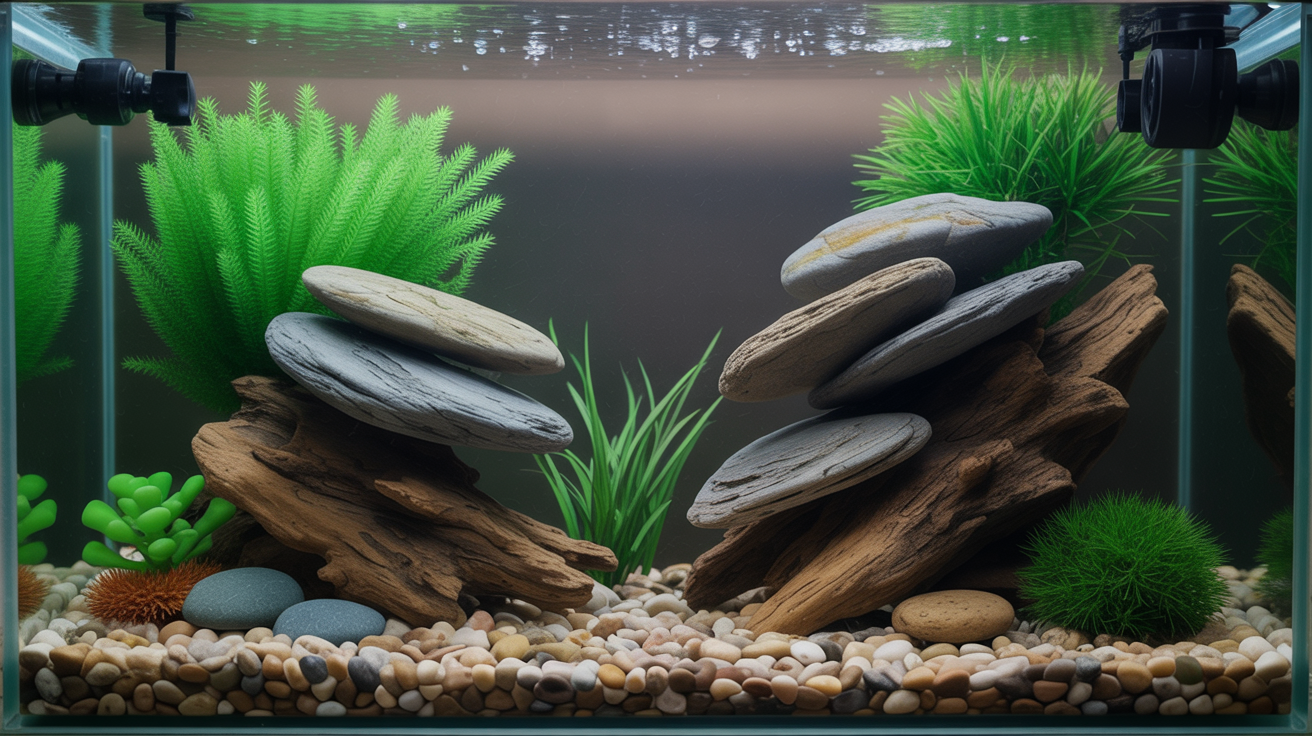
River stones are smooth, safe, and cost almost nothing. You can collect them from local streams or buy them from garden centers.
How to create this look:
- Test rocks with vinegar first—if they fizz, they’ll raise pH and shouldn’t be used
- Sterilize rocks by soaking in a weak bleach solution, rinsing completely, then soaking in dechlorinated water
- Stack larger rocks to build caves and use smaller ones as accents around plants or to hide equipment
River stones create beautiful aquascapes that look natural. They give your fish places to hide and territory to claim as their own.
Holiday Ornament Decorations
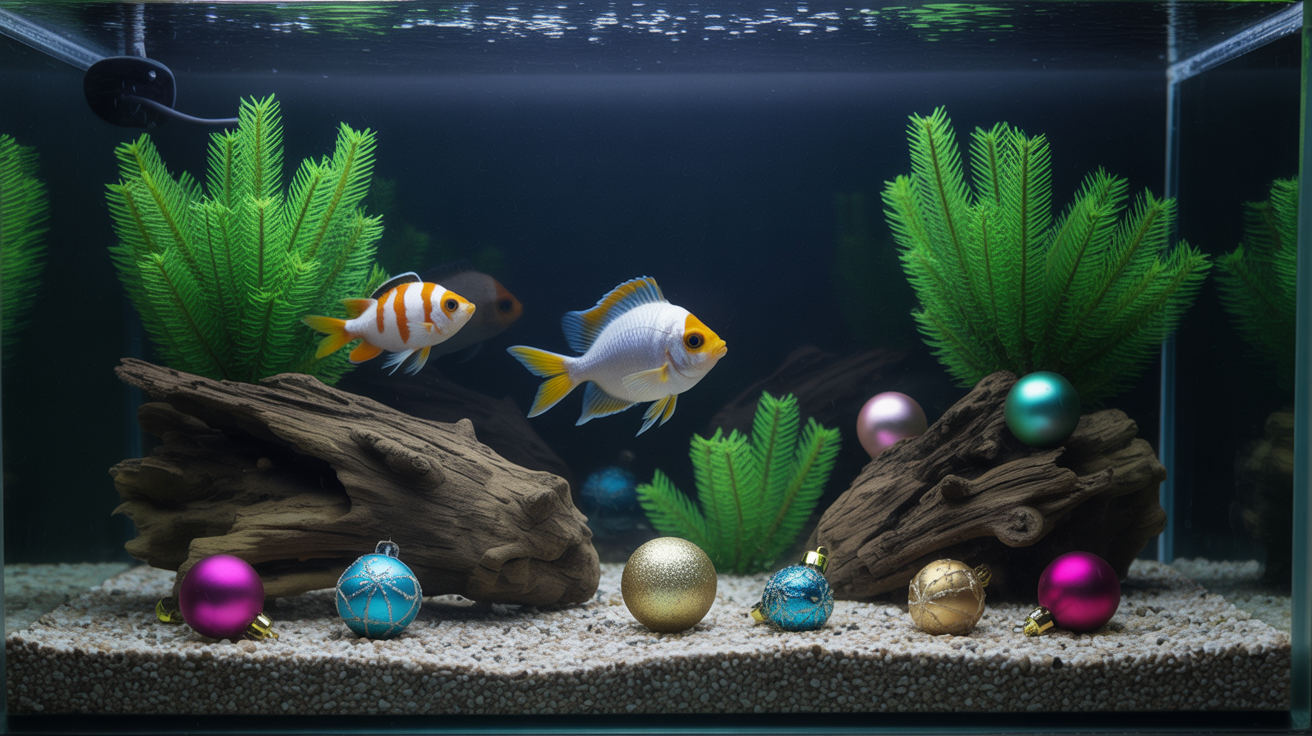
Your aquarium can celebrate holidays too. Changing tank decorations every season makes your tank feel fresh and fun.
How to create this look:
- Remove all metal hardware from glass Christmas ornaments before putting them in water
- Fill glass ornaments with water so they sink to the bottom instead of floating
- Use battery-operated string lights around the outside of the tank for added holiday glow
Food-safe ceramic figurines create perfect seasonal themes. Try tiny pumpkins for fall, snowmen for winter, or bunnies for spring—just check that they’re properly glazed.
Superhero or Movie-Themed Tank
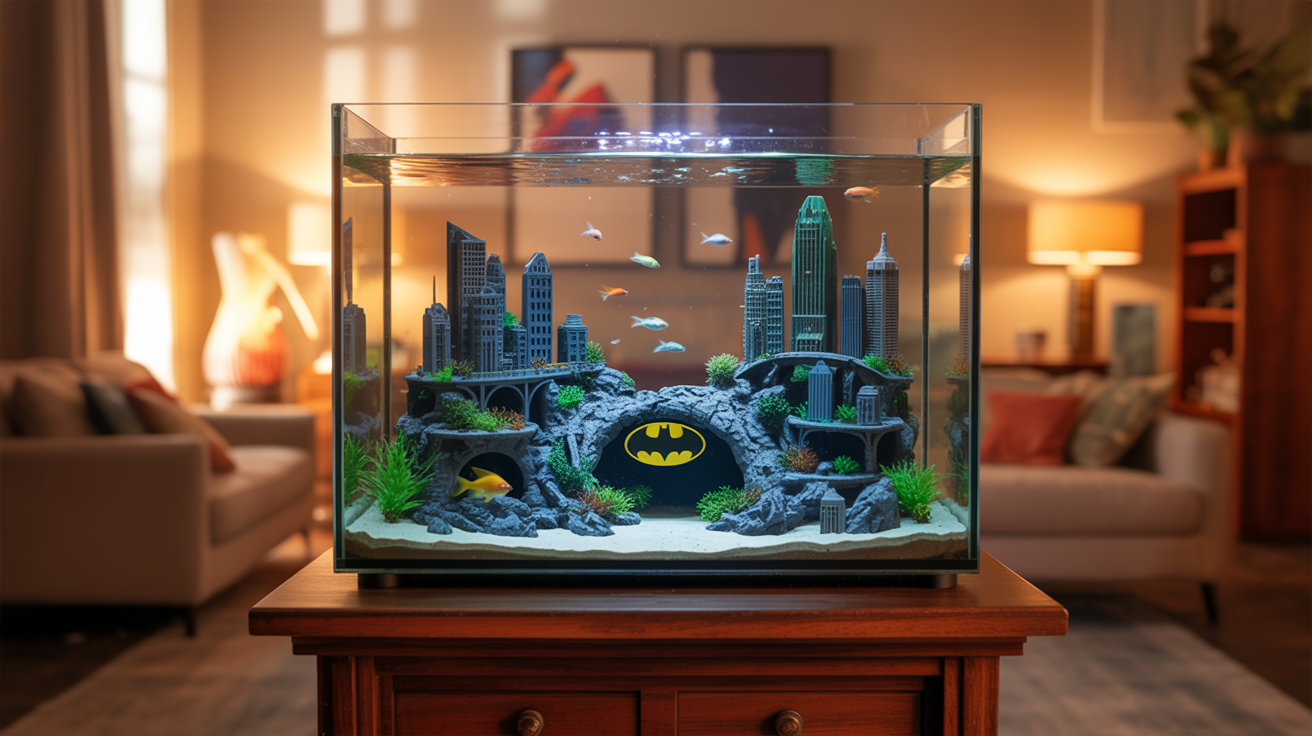
Superhero tanks let you combine your hobbies. Create scenes with your favorite characters from Avengers, Justice League, Disney, Mario, or Star Wars.
How to create this look:
- Use aquarium-safe plastic figures of your favorite characters and place them throughout the tank
- Print waterproof cityscapes or movie backdrops, laminate them, and attach them to the outside back of the tank
- Arrange vertical rocks to look like buildings for superhero themes, or use light sand for space scenes
Match your rocks and sand to each theme for the best effect. The right foundation makes everything look planned instead of random.
Dinosaur-Themed Tank
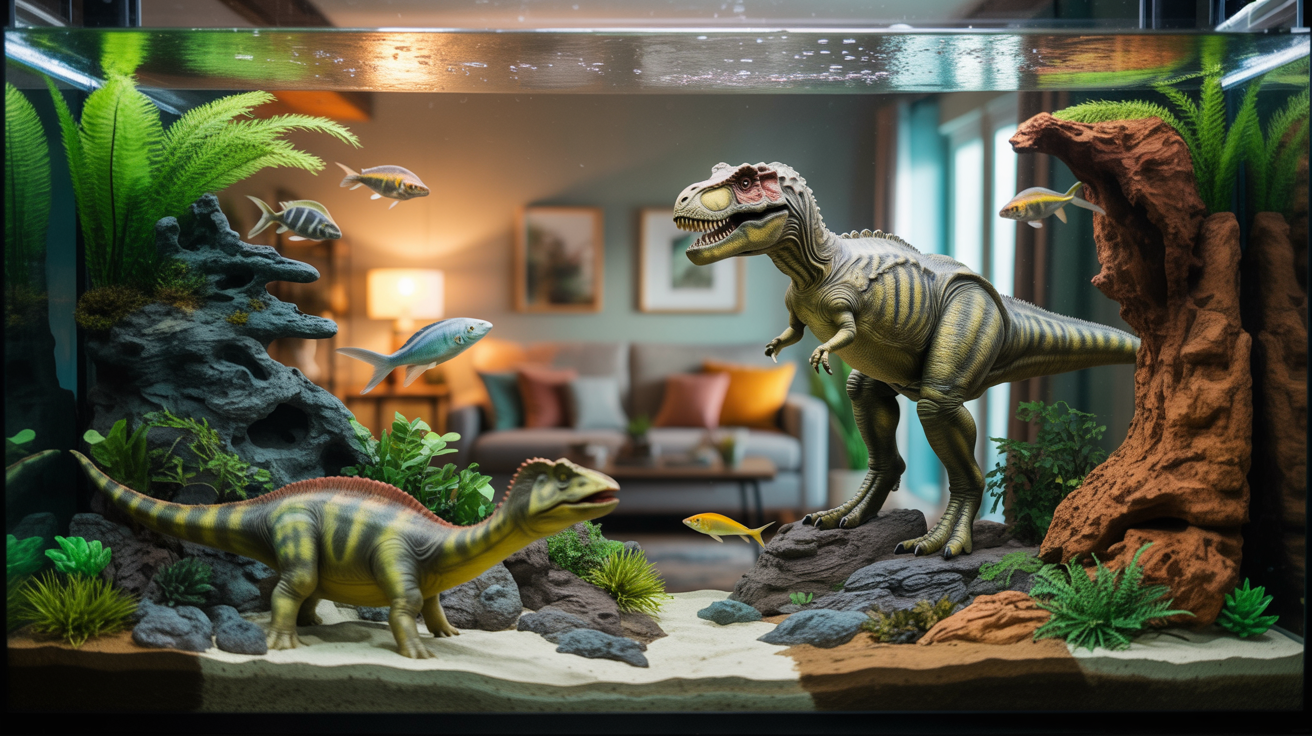
Dinosaur tanks take you millions of years back in time. Kids especially love watching fish swim around prehistoric scenes.
How to create this look:
- Plant broad-leaf plants like Amazon swords and Anubias to look like ancient jungle plants
- Add plastic dinosaur figurines or make clay dinosaur eggs with food-safe polymer clay
- Twist aquarium-safe rope around driftwood to create climbing vine effects
Making clay dinosaur eggs is easier than you think. Shape small eggs from food-safe polymer clay, bake them, seal with aquarium-safe silicone, then place them in clusters near plants.
Underwater Lost City
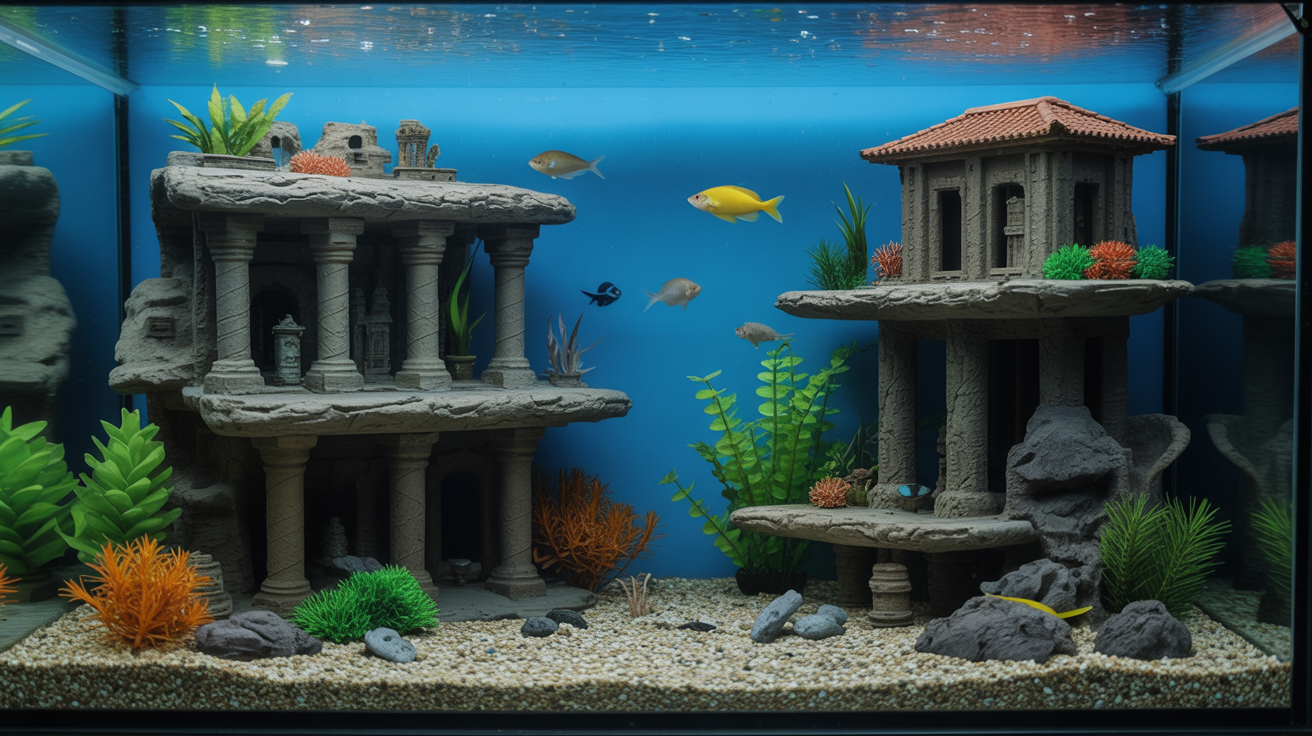
Lost city themes spark imagination. Use miniature buildings to create ruins that look like nature is taking them back.
How to create this look:
- Use resin or ceramic miniature structures from tabletop gaming stores as ancient ruins
- Attach moss to your ruins using fishing line so it spreads naturally for an overgrown, abandoned look
- Add 3D-printed temples or statues using aquarium-safe resin for extra personalization
The overgrown city requires patience. Within a few weeks, the moss spreads naturally over the ruins, and your theme truly comes alive.
Pirate Shipwreck Theme
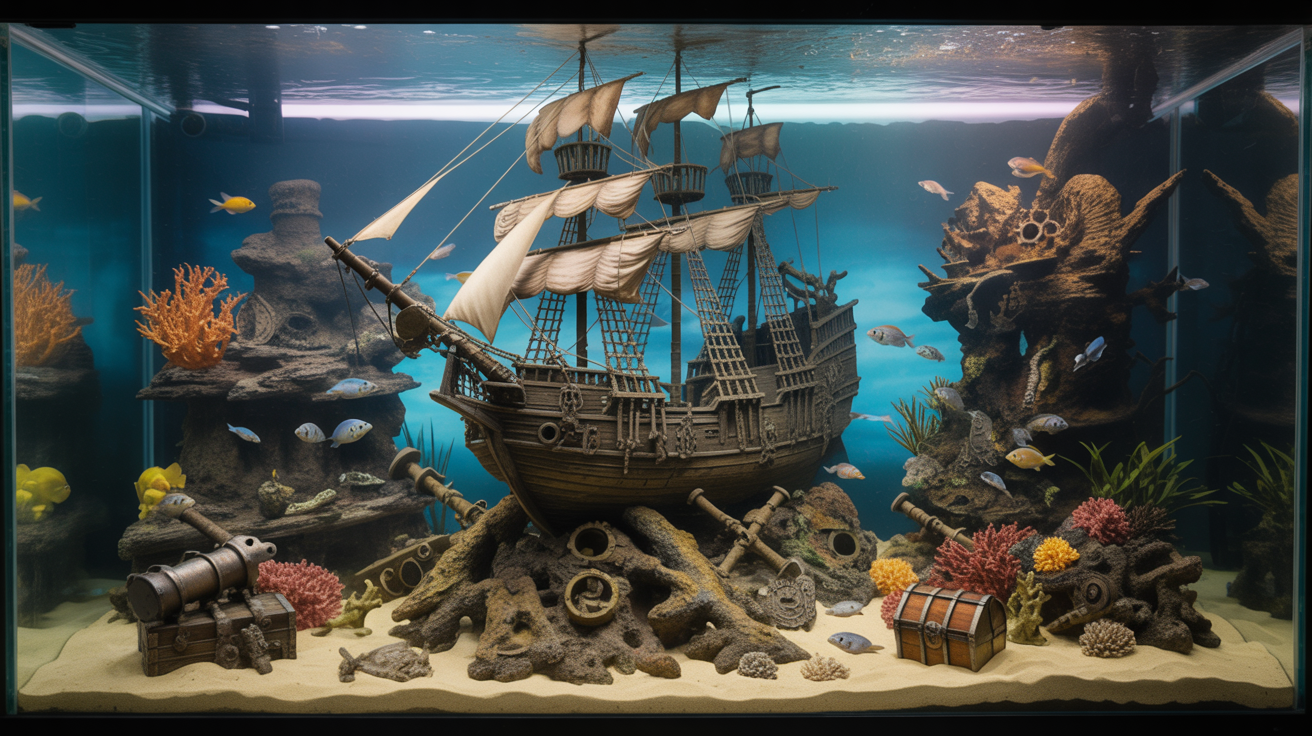
Pirate themes never go out of style. Shipwrecks, treasure, and skull decorations create exciting underwater scenes.
How to create this look:
- Create custom caves using resin-safe casting kits with pirate ship molds
- Add sealed treasure chests, plastic gold coins, aquarium-safe rope, and skull ornaments around the wreck
- Plan all your decorations before choosing fish to make sure active swimmers have enough open space
Always measure open swimming areas before adding fish. Pirate themes can get crowded with decorations, so leave plenty of room for fish to move freely.
Spooky Halloween Theme
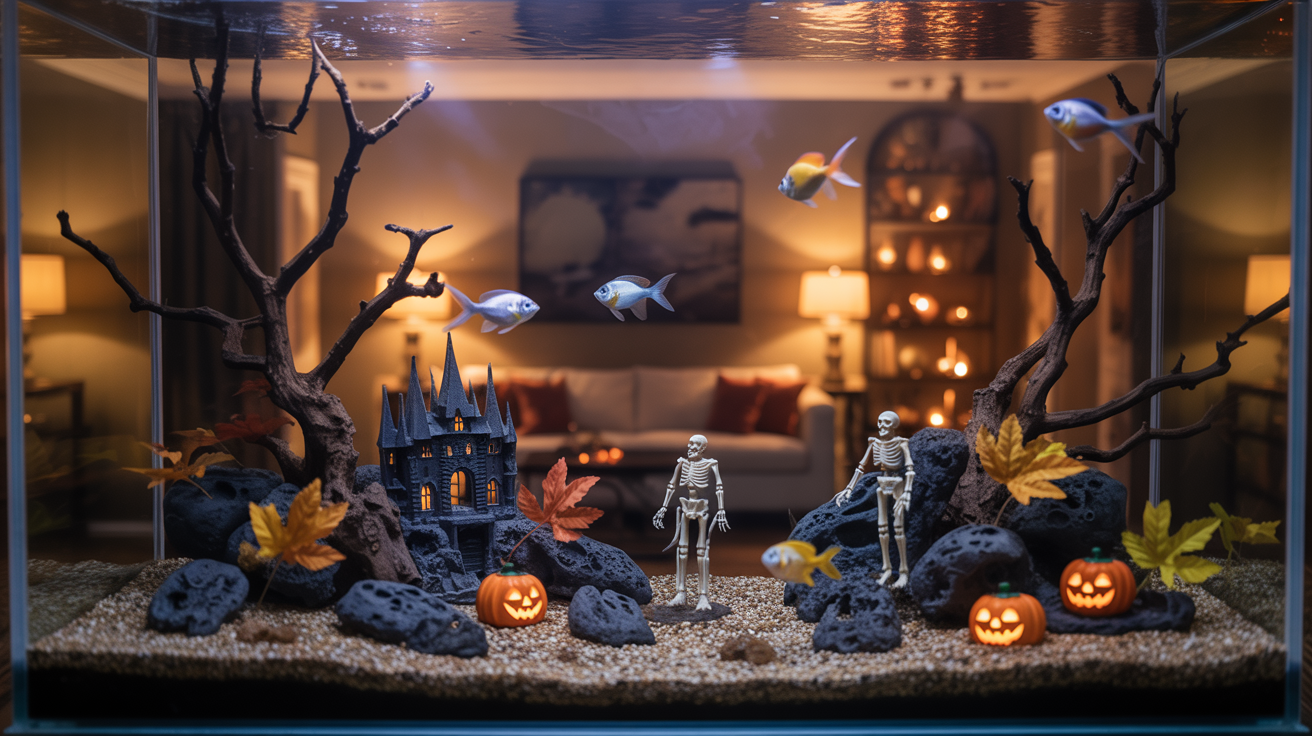
Spooky tanks work year-round if you love dark looks. The moody lighting creates a hauntingly beautiful effect.
How to create this look:
- Position driftwood shaped like dead tree trunks vertically to create a haunted forest effect
- Add catappa leaves and alder cones to create tannin-rich amber water that looks mysterious
- Stack smooth aquarium-safe stones vertically to create tiny tombstone arrangements
Dark botanicals release tannins that stain your water brown or amber. This creates natural mood lighting that’s perfect for spooky themes and makes everything look eerie.
DIY Lighting & Movement Elements for Unique Tanks
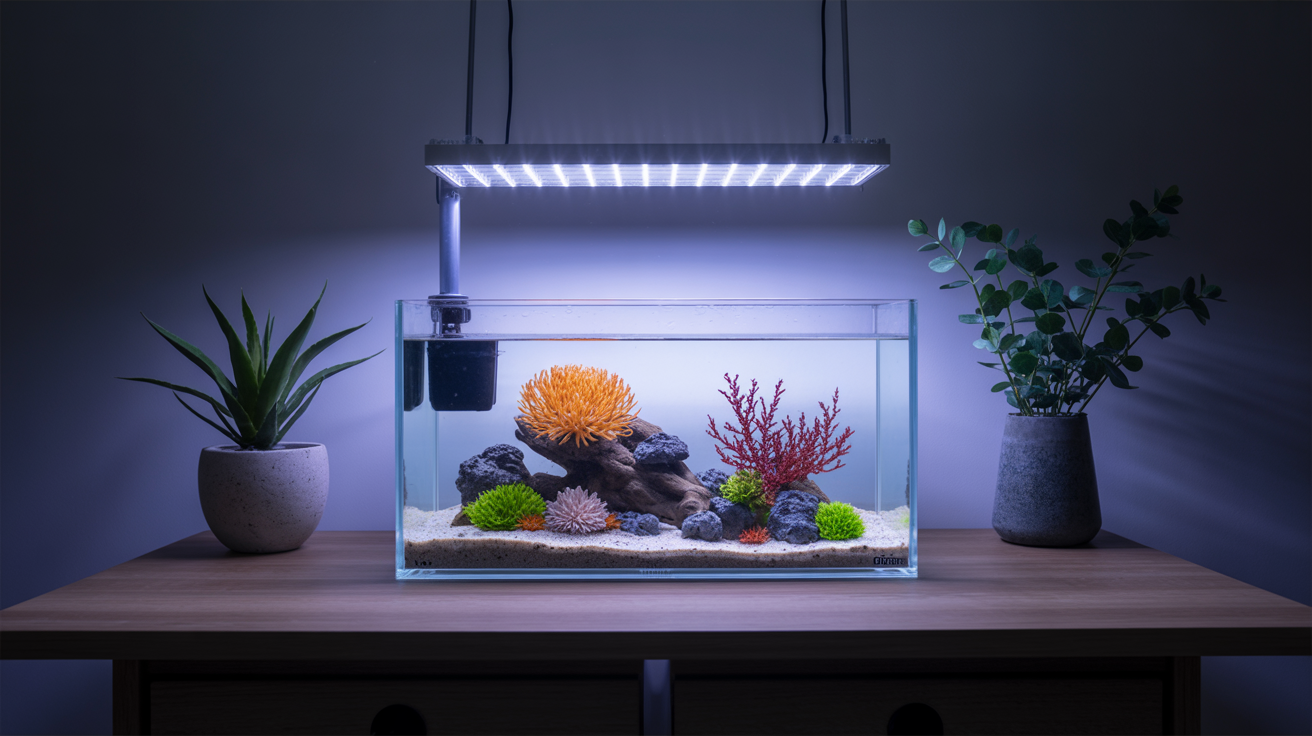
Lighting and movement bring your aquarium to life. I added LED strips to my first tank and couldn’t believe the difference. The colors popped, the fish looked healthier, and the whole room felt more alive.
- External options: Solar-powered lights or LED strips work outside the tank. Place them behind or under the aquarium for dramatic glow effects without water contact risks.
- Background illumination: LED background lighting creates depth and highlights plants. Stick waterproof strips to the outside back glass for colorful accent lighting.g
- Safety first: Avoid submersible string lights unless they’re specifically rated for aquariums; regular lights can short-circuit and electrocute your fish.
- Unique bubblers: Bubble curtains, volcano bubblers, and treasure chest bubblers add constant movement, fish love playing in the bubbles, and they increase oxygen levels
- Hide tubing: Tuck airline tubing behind rocks, under substrate, or inside decoration; visible tubing ruins the natural look you’ve worked hard to create
Fish-Safe Tips When Using DIY Decorations
Safety comes first when adding DIY items to your tank. I learned this the hard way after a painted rock killed half my fish. Now I test everything before it touches my aquarium water.
- Food-safe only: Use ceramics labeled food-safe and hard plastics without BPA; these won’t leach chemicals into your water, as decorative items might
- Smooth edges: Check every decoration for rough or sharp spots that could cut fins, file down any edges that feel remotely pointy before adding them
- No metal: Avoid all metal unless it’s stainless steel and specifically aquarium-rated, regular metals rust and poison your fish with copper and other toxins
- Soak test: Place new decorations in a bucket of dechlorinated water for 24-48 hours and test pH and ammonia; any changes mean the item isn’t safe.
- Visual inspection: Look for flaking paint, color bleeding, discoloration of water, or chemical odors after soaking; any of these signs means throw it away immediately
Conclusion
Your fish tank can be so much more than just glass and water. With the right decorations, you’ve got a beautiful underwater world that keeps your fish happy and healthy while looking amazing in your space.
We’ve covered natural setups with rocks and driftwood, colorful themed tanks, and safe DIY options that won’t harm your aquatic friends. You now have everything you need to create an aquarium that reflects your style and gives your fish the environment they deserve.
Start with one or two ideas that excite you most. You don’t have to update everything overnight. Try a new background, add some plants, or rearrange what you already have. Then come back and tell us what worked. What’s your favorite fish tank decoration style? Drop a comment below and share your setup with other aquarium lovers.
Frequently asked questions
What are some unique fish tank decoration ideas for beginners?
Start with natural elements like driftwood, smooth river rocks, and live plants. Add a simple background poster for depth. Use aquarium-safe ornaments sparingly to avoid overcrowding. Create hiding spots with caves or hollow decorations. Keep it simple so cleaning stays easy while giving your fish interesting spaces to visit.
How do I choose safe decorations for my fish tank?
Only use items labeled aquarium-safe or designed for fish tanks. Avoid sharp edges that can injure fish. Skip painted or treated wood unless it’s aquarium-specific. Test decorations by soaking them first. Natural materials like rocks should be boiled. Never use soap or chemicals when cleaning decorations.
Can I use household items to decorate my aquarium?
Some household items work, but most don’t. Avoid anything painted, metallic, or treated with chemicals. Safe options include certain ceramics and terracotta pots. When in doubt, don’t use it. The risk of contaminating your water and harming your fish isn’t worth saving a few dollars on decorations.
What’s the best way to arrange decorations in a fish tank?
Place taller decorations in the back and shorter ones in front for depth. Leave an open swimming space in the middle. Create hiding spots along the sides and corners. Avoid blocking filter flow or overcrowding. Think about your fish’s needs; some like caves, while others prefer plants and open water.
How often should I clean fish tank decorations?
Clean decorations during regular water changes, usually every 2-4 weeks. Remove algae buildup with an aquarium-safe brush or scrubber. Rinse with tank water, never tap water with chlorine. Deep clean decorations every few months by scrubbing and soaking in aquarium-safe cleaner if needed.